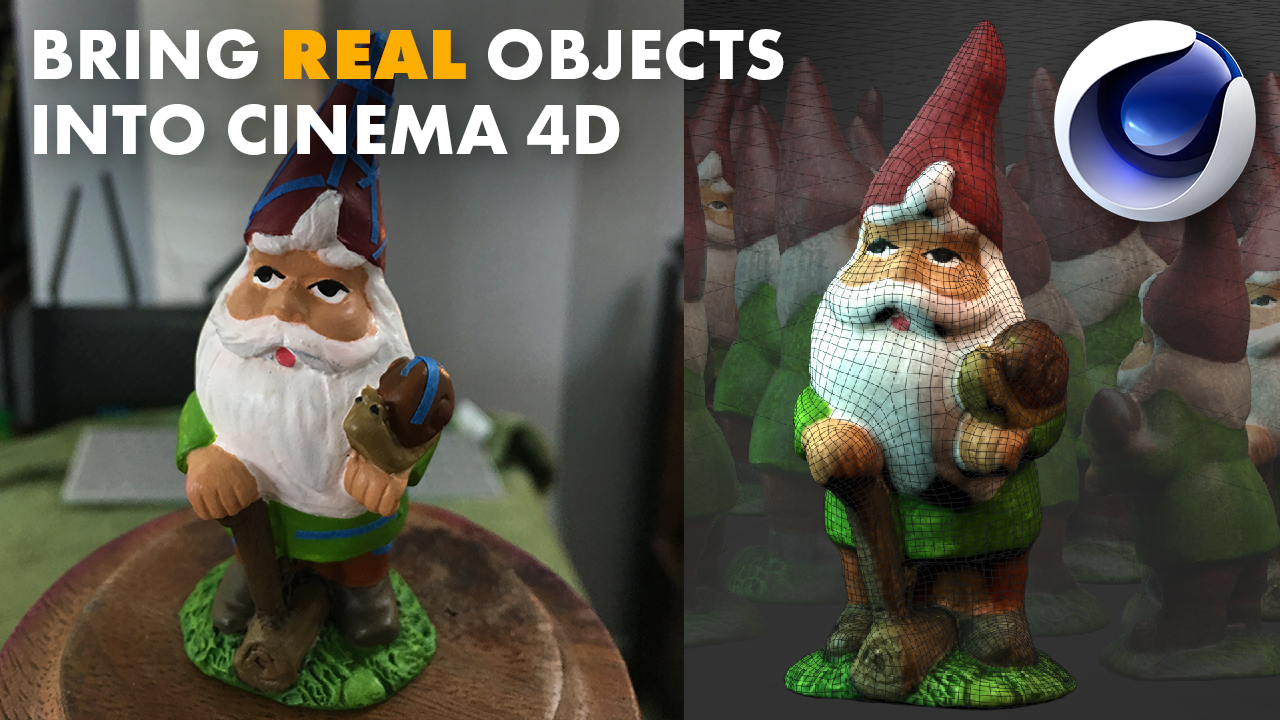
In this FIRST tutorial by Chris Schmidt for Rocket Lasso, he teams up with Aaron Covrett to take you from the start to finish through the process of using photogrammetry to bring a real-life object into your 3D workflow. We tackle valid candidate objects, taking your photos, photogrammetry, mesh cleanup, retopography, UV unwrapping, texture transfer, texture cleanup, adding detail to textures, and bringing it all back into Cinema 4D with Redshift!
Be sure to follow special guest Aaron Covrett:
Aaron Covrett Twitter
Aaron Covrett Instagram
00:00:05 – Intro (With Aaron Covrett)
00:02:20 – What is a valid object?
00:08:05 – Taking your photos
00:12:43 – Meshroom (Photogrammetry)
00:22:10 – Preparing your model (Cinema 4D)
00:42:20 – Retopography (3DCoat / Instant Meshes)
00:55:46 – UV Unwrapping (Cinema 4d / RizomUV)
01:14:59 – Transfer Material between meshes (Cinema 4D)
01:22:25 – Clean up your texture (Photoshop)
01:38:39 – Add the next level to your texture (Substance Painter)
02:00:32 – Build your materials (Cinema 4D with Redshift)
02:05:16 – Outro (With Aaron Covrett)
02:07:07 – Support Rocket Lasso
If you make anything fun inspired by techniques in this tutorial, be sure @me on Instagram or Twitter. See you next time!
Follow!
www.Twitter.com/RocketLasso
www.Twitch.tv/rocketlasso
www.Instagram.com/RocketLasso
Music: Ronald Jenkees
What inspired Aaron to do reflection for UV transfer:
Software used:
Cinema 4D
Meshroom
Other Photogrammetry Software
3DCoat
Instant Meshes
RizomUV
Substance Painter
Get access to bonus streams, scene files, and more on Patreon
Speed Up Your Workflow with a Double-Click: RECALL by Rocket Lasso